How to Root the Samsung Galaxy S5 [Root Guide]
How to Root the Samsung Galaxy S5 [Root Guide]
This YouMobile Root Guide will show you How to Root your Samsung Galaxy S5 (SM-G900F) Step-by-Step with all the links/files you'll need during the process. Warning: This will void your warranty.
Step #1
First, you will need Chainfire's CF-AutoRoot, Download it HERE. This 21MB zip contains both CF-AutoRoot (Screenshot above), which we'll be showing you how to flash through Odin, and the Odin software itself. The CF-AutoRoot file will have a ".tar.md5" extension, and your resident archive software (WinRAR, 7Zip, etc) will likely let you extract the contents. Do not do that. Simply extract the contents of the first .zip and no more.
Step #2
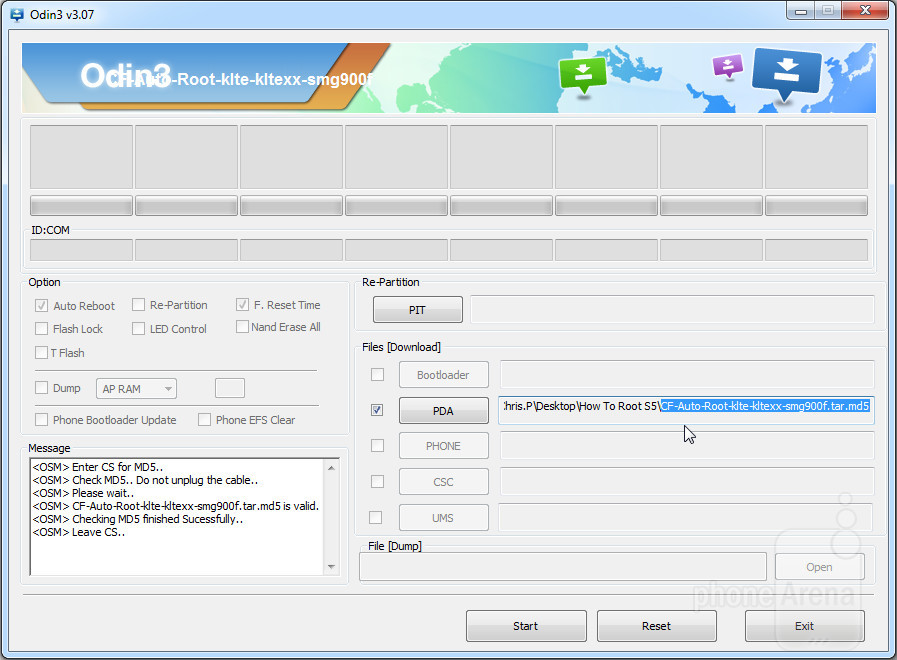
Now you downloaded both the ".tar" file that you'll be flashing, and also Odin, which we will use to do the flashing. For the next step, you need to have your Galaxy S5 disconnected from your PC, so unplug the USB cable for now. Start Odin3-v3.0.7.exe. Click the PDA tab, and select the CF-Auto-Root-klte-kltexx-smg900f.tar file you extracted just before. A short confirmation will appear in the log box on the bottom left.
Step #3

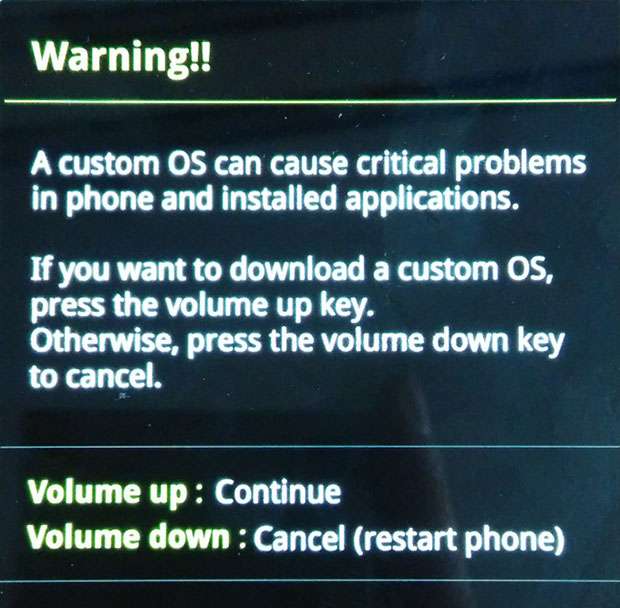
Next up, you need to get your Samsung Galaxy S5 into "Download Mode". Easy stuff. Just turn off your smartphone completely, wait for a few seconds, and click Volume Down and the Power and Home buttons simultaneously. A few short seconds after, and you'll be greeted with the screen you see on your left. Press Volume Up to continue if asked.
Step #4
You now need to ensure that there's communication between Odin and your Galaxy S5. So plug in your S5 to a USB port on the computer, and the one of the smaller boxes on the top left should light up with the ID of the particular USB port you're using. See the screenshot on the left for reference.
If you do not have that, then drivers for your device are missing. Installing latest Samsung Kies is usually a good way to ensure conformity. You need to complete this step in order to continue.
Step #5

So, now the CF-AutoRoot .tar file is loaded in the PDA field, Odin recognizes your Galaxy S5 sitting in Download mode, and you're ready for action. Just make sure you haven't messed with any other option, especially Re-Partition, and you're good to go.
Just hit start next, and you'll see two things: the log box on the bottom left will start churning info, all the while the big rectangular field immediately above the ID:COM one will start flashing colors and showing text. Eventually, and if everything goes well, you should get a green big "PASS!". We're almost done!
Step #6

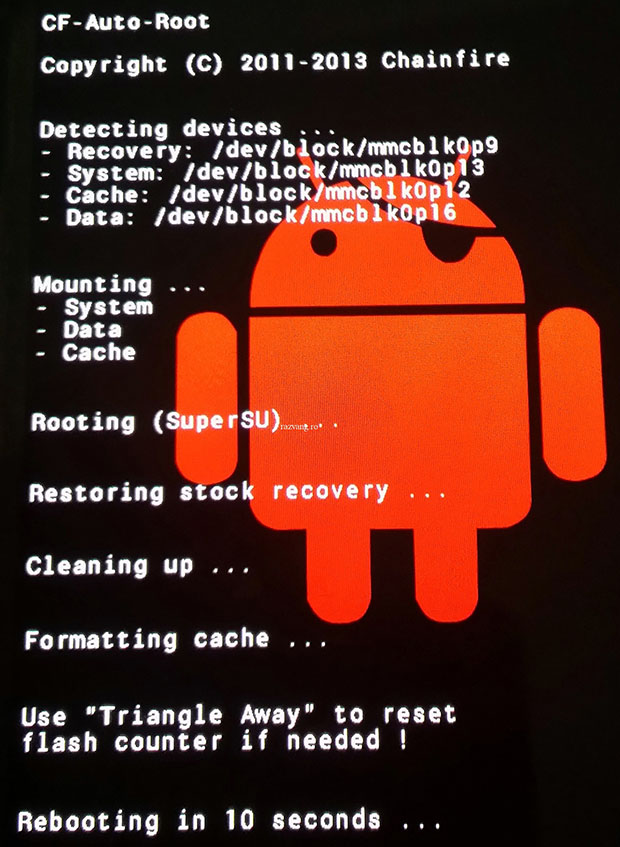
Once you get the coveted "PASS!" in Odin, your Galaxy S5 should reboot by itself. Your phone should then enter a special recovery with a red Android logo. You don't have to do anything, just wait out the procedure and your Galaxy S5 is Now Rooted (Evil Laugh)!
Note: If your phone does not reboot into recovery mode on its own and go through the above-mentioned red-Android-logo procedure, then you should just go through these steps again. If this persists, you should just enter recovery mode manually after flashing the .tar file through Odin. Just press Volume Up and the Home and Power buttons simultaneously, and the installation should continue automatically from thereon.

© 2023 YouMobile Inc. All rights reserved


