Search result


.jpg)
The Ultimate Root Checker Allows users to check root access on their devices by just tapping on Check Root. The Root Results are then presented back in rich visual representation.
.jpg)
Rooting is the Android equivalent of jailbreaking, a means of unlocking the operating system so you can install unapproved apps, update the OS, replace the firmware, overclock or underclock the processor, customize just about anything.
.jpg)
- Detects if your Android device has Root access
- Displays your android device
- Displays Android device's Build Information
Follow us at
https://www.facebook.com/YouMobile.org

Chainfire's SuperSU App, one of the most popular "poweruser" tools for Android, which allows you to gain root access and manage root permissions for the apps that might need it, has just been updated with a substantial update. The most recent version of the app (v2.35), is the first full update ever since 2.01, which rolled out in the beginning of June.
SuperSU v2.35 is a substantial improvement of the app for several reasons. The most important one is the app's now fully compatible with Android 5.0 Lollipop. Chainfire reveals that it has been quite hard to find a viable workaround for hopping over the hurdles that Google has implemented in SELinux, along with everything else that prevented SuperSU from gaining root access. However, the app might still have issues with some of the early unofficial Lollipop builds that have surfaced for select Android warriors of late.

Apart from this, the user interface of the SuperSU app has been slightly refreshed in accordance with the Material Design guidelines. Chainfire says that he's made only slight imporvements over the previous layout, as the full adoption of Material Design is not "a top priority at the moment". But let's be frank here, folks the beauty of SuperSU does not lie in its interface, but in the under-the-hood features that it has in tow.


HTC One M8 is the latest Flagship released by HTC and its rooting method HTC One M8 is already on the Web. The method is separate for both TWRP Recovery and Rooting HTC One M8, this is not an all in one Root toolkit of Auto-Root method. We are providing you the rooting tutorial of HTC One M8 thanks to XDA forums member mike, that has ported the latest TWRP from M7 and made a Flashable .zip file of Super SU apk and Binaries. How To Root and Install CWM Recovery On HTC One M8. Rooting will void your warranty and may brick your device.
Requirements

- Well Charged Battery 60%-80% is recommended.
- Back-Up all your important Contacts, Call Logs & Messages. It is highly recommended in case of any mishap or data loss to back up all your important data.
- Back-Up your Mobiles EFS Data.
- Check your device model, Go To Setting > About and Make sure that it is HTC One M8 (not M7).
- Do-not try it on HTC One M7.
- Bootloader Must Be Unlocked: Follow Unlock Bootloader Of HTC Smartphones.
- Make Sure Fastboot Is Configured: Download & Install Android Adb Fastboot Drivers on Your Windows PC.
- Enable USB Debugging Mode
- Download USB Driver For HTC Devices: Download Here
- Download TWRB Image HERE
- Download Super SU HERE (Android_Revolution_HD_Root_and_BusyBox.zip)
- Copy the TWRP Image in the Fastboot folder.
- Go To Phone Settings and Disable Fastboot in Power Options.
- Turn Off the Device.
- Turn off your phone and open HBOOT mode. How? Press and hold Volume Down + Power button until you see some text on Screen, Select Fastboot in the Menu.
- Connect your Device With PC.
- Now Open Command prompt in Fastboot Folder, How? Hold Shift Key and Right Click anywhere in the Fastboot folder .
- Type in the Following Command one after the Other:
- Your device will Now Reboot and TWRP Will be installed on your device.
- Copy the Super SU.zip files to the Root of your Device Sdcard.
- Turn Off your device.
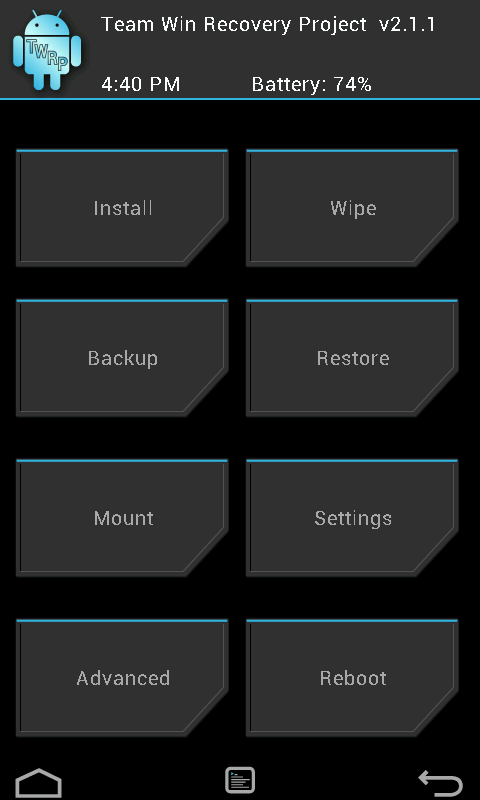
- Turn off your phone and open HBOOT mode. Here's How: Press and hold "Volume Down + Power" button until you see some text on Screen, Select Recovery in the Menu.
- Tap On Install and Select the Super SU File and slide the button to start the process.
- Once done go back to TWRP Recovery and Reboot the Device.


In this tutorial we will show you hot to Root your Moto Nexus 6 with a 1-Click tool kit. Simple steps that are easy to do and not too much files to download. Check the Requirements first, then follow the Steps below it. NOTE: Rooting will void your warranty and may brick your device, root at your own risk.
The most simplified and user-friendly way to root your Nexus 6 is using the Nexus Root Toolkit, developed by XDA's WugFresh, which is compatible with a wide range of Nexus devices, including the more popular Nexus 5, 6, and 9. It's a simple Windows program that allows you to do several things.
Toolkit Root Tutorial:
Step 1. Enable developer options menu on your Nexus 6: Settings > Tap your Build 7 times (then configure drivers if you haven't already with the driver guide)
Step 2. Open developer options: Settings > Developer Options
Step 3. Enable USB Debugging, and "enable oem unlock"

Step 4. In Nexus Root Toolkit on your PC, select the correct device and build (what you are currently running)
Step 5. Configure your drivers if you haven't already using the driver guide
Step 6. If you need to, backup your important data.
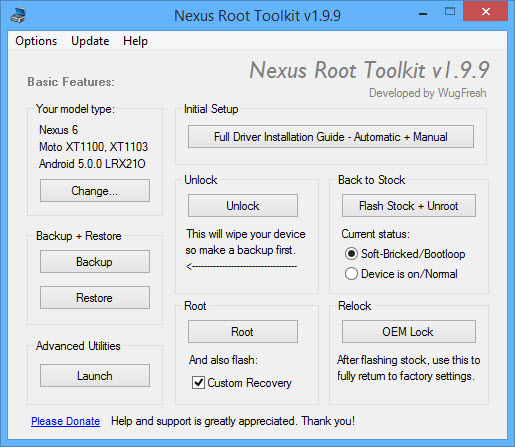
Step 7. Unlock your device (if needed)
Step 8. Root your device
Step 9. Done! your Nexus 6 is now Rooted...


Our Mission is Keeping you updated with Latest Android News and Updates as it Happens!

© 2023 YouMobile Inc. All rights reserved